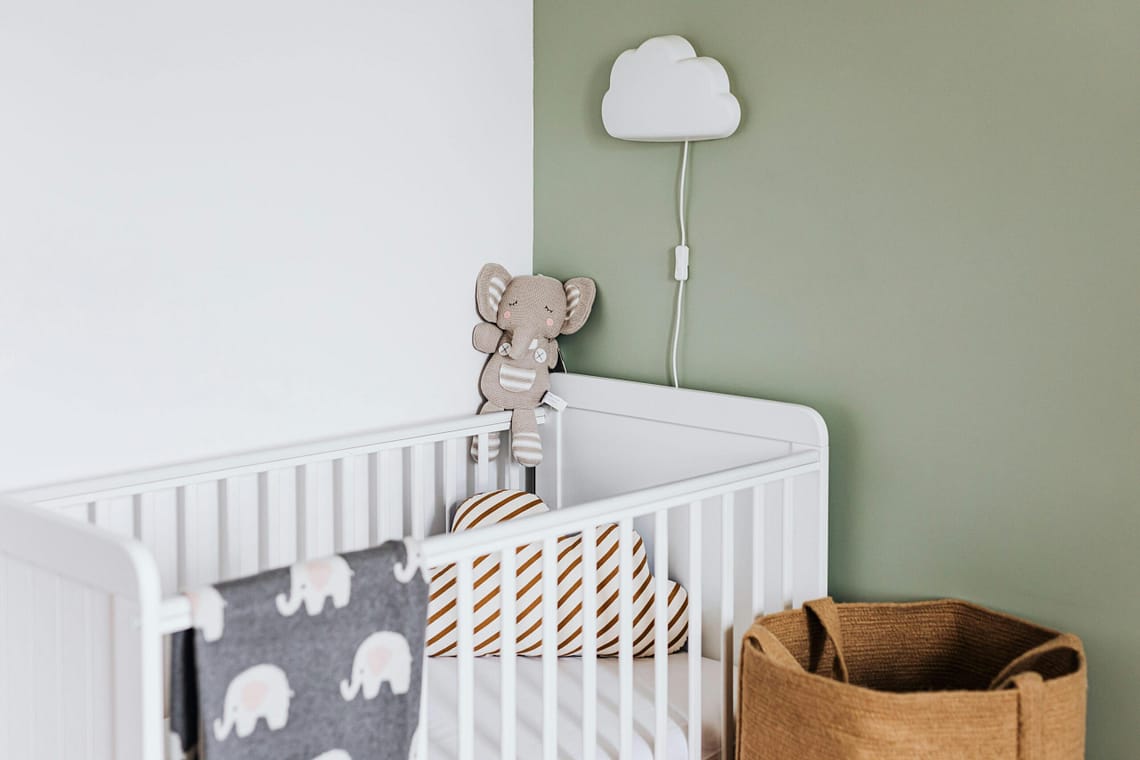
Brilliant Ways to Upcycle Your Old Baby Crib
That beautiful baby crib that cradled your little one won’t be needed forever. Instead of letting it gather dust in storage or selling it for a fraction of what you paid, why not transform your old baby crib into something spectacular?
As a parent who’s navigated the bittersweet transition from nursery to big-kid room, I’ve discovered these ingenious crib upcycling projects that give old cribs new life. These DIY baby crib transformations are budget-friendly, eco-conscious, and surprisingly easy to complete.
Why Upcycle Your Baby Crib Instead of Throwing It Away?
Before we dive into the projects, here’s why repurposing your crib makes sense:
- Save money on new furniture pieces
- Reduce waste and embrace sustainable living
- Preserve memories while creating something functional
- Customize furniture to match your home décor perfectly
Let’s explore the best ways to breathe new life into that old nursery furniture.
1. Transform Your Crib Into a Stylish Convertible Sofa
Difficulty Level: Intermediate | Time Required: 4-6 hours
With the right cushions and some creative positioning, that old crib becomes a unique conversation piece in your living room. This crib-to-sofa conversion works especially well with vintage wooden cribs.
What You’ll Need:
- Foam cushions cut to size
- Upholstery fabric
- Sandpaper and paint (optional)
- Basic tools
Pro Tip: Use weatherproof cushions if you plan to place this on a covered porch.

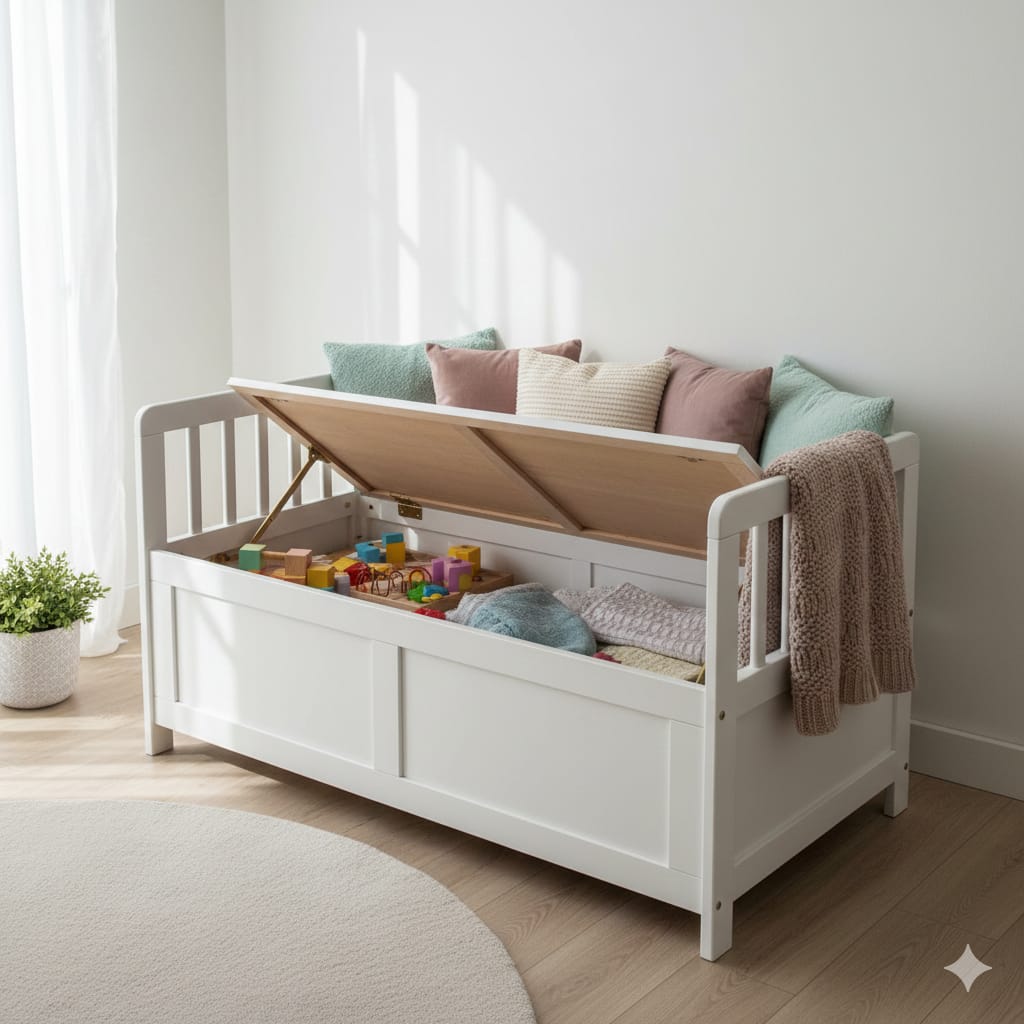
2. Create a Storage Bench with Hidden Compartments
Difficulty Level: Beginner-Intermediate | Time Required: 3-4 hours
Remove the front railing, add hinges to the mattress base, and create a charming storage bench that hides toys, linens, or seasonal items while providing extra seating. This is one of the most practical baby crib repurposing ideas.
Step-by-Step Overview:
- Remove the front rail carefully
- Sand and refinish the wood
- Attach hinges to the mattress support
- Add a cushioned top for comfort
- Paint or stain to match your décor
This DIY crib bench is perfect for entryways, mudrooms, or at the foot of a bed.
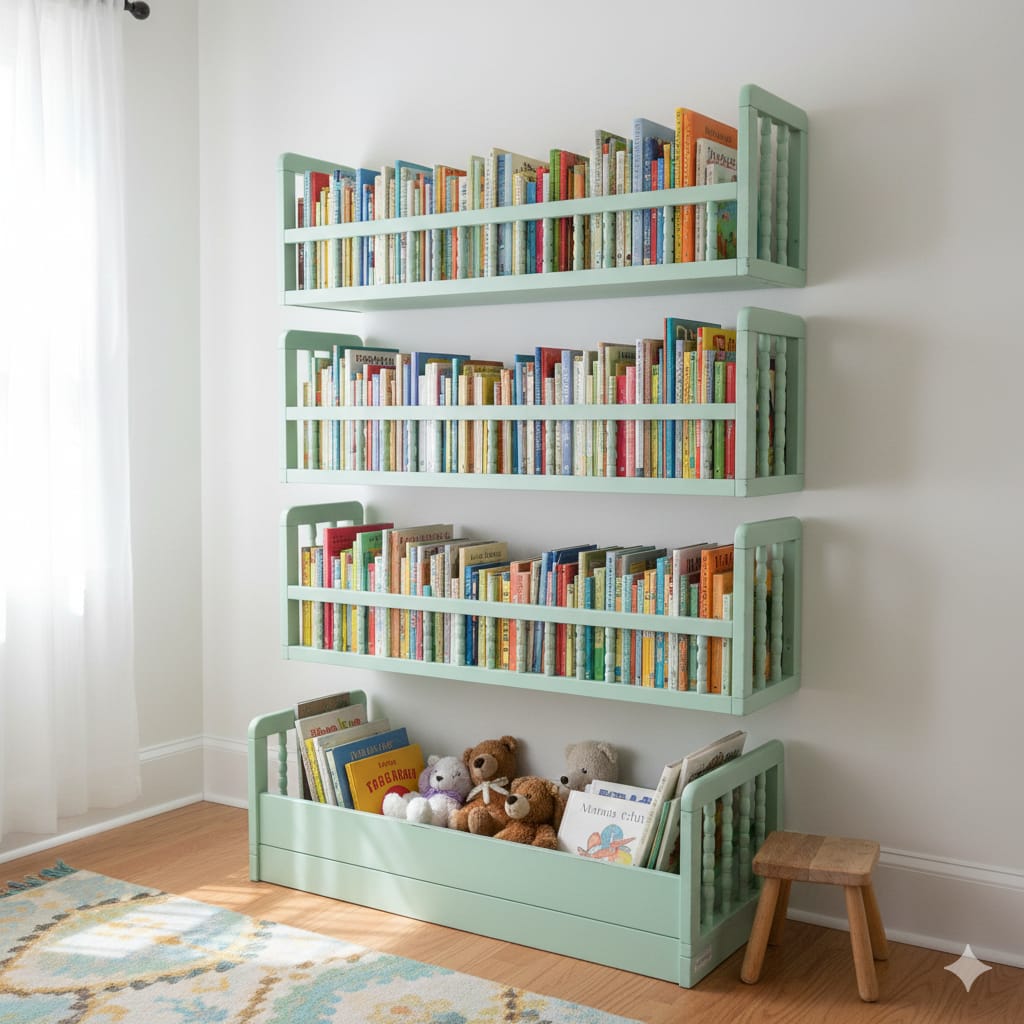
3. Build a Cozy Reading Nook for Your Growing Child
Difficulty Level: Beginner | Time Required: 2-3 hours
Remove one side of the crib and add cushions to create a charming bench where your growing child can curl up with books. This crib reading nook helps ease the transition from crib to bed while keeping the familiar piece close.
Design Ideas:
- Include built-in bookshelf on the side rails
- Add a canopy for extra coziness
- Paint in bright colors to match your child’s personality
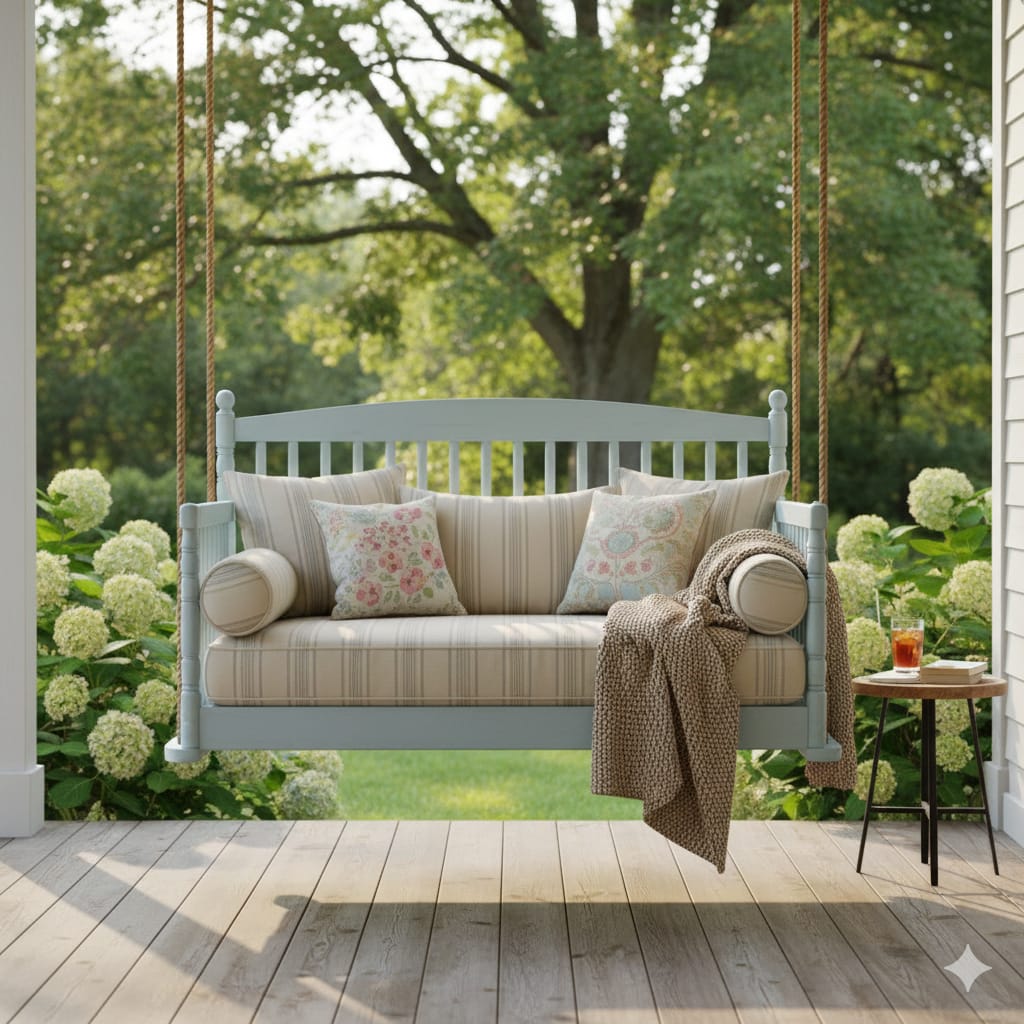
4. Weekend DIY Project: Outdoor Porch Swing
Difficulty Level: Intermediate-Advanced | Time Required: 5-8 hours
With some rope and basic tools, transform the crib mattress base into a relaxing porch swing that’ll become your favorite outdoor retreat. This baby crib swing project is perfect for those lazy summer afternoons.
Safety First:
- Ensure your porch beam can support the weight
- Use heavy-duty rope or chains rated for outdoor use
- Sand thoroughly to prevent splinters
- Apply weatherproof sealant
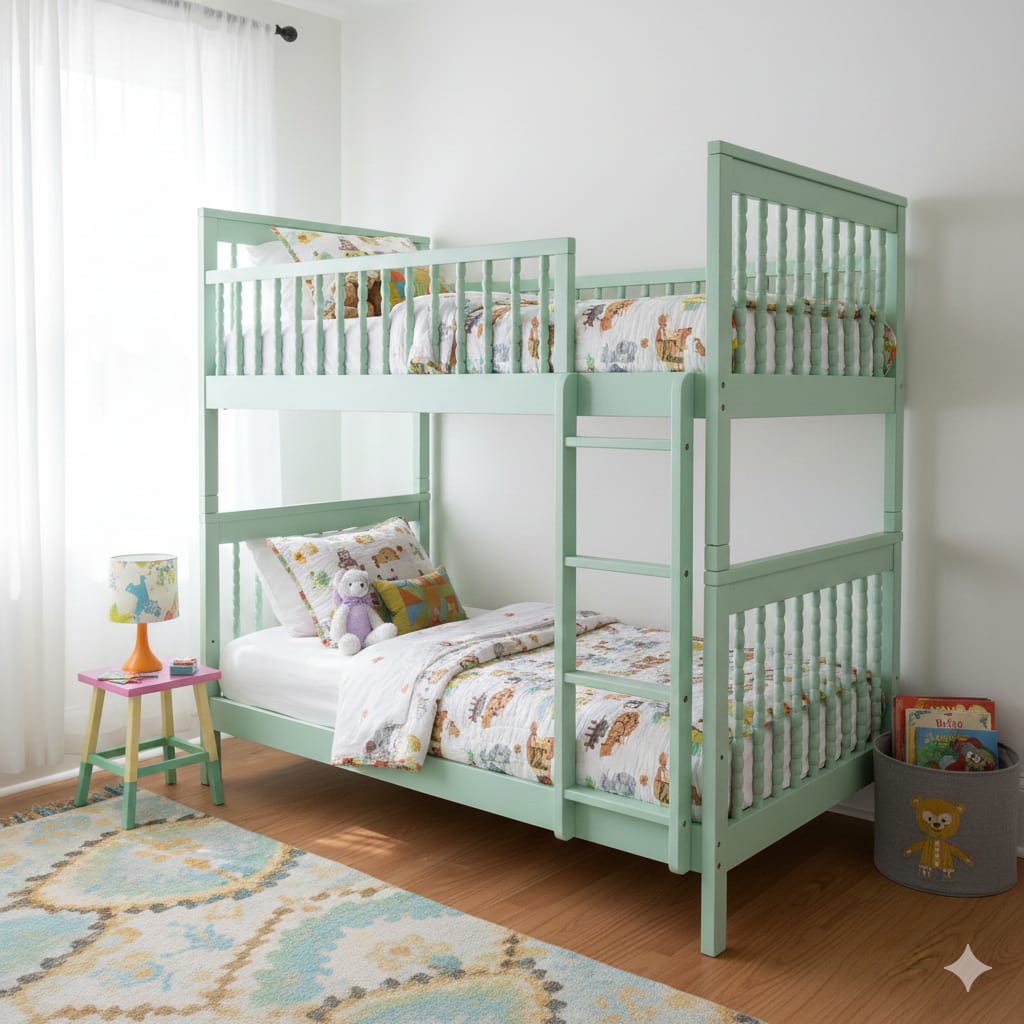
5. Double the Fun: Stacked Bunk Beds
Difficulty Level: Advanced | Time Required: 8-10 hours
With some carpentry skills, transform two matching cribs into an adorable small-scale bunk bed set—perfect for toddlers transitioning to “big kid” beds or for doll displays.
Important Considerations:
- Ensure structural stability with proper reinforcement
- Follow safety guidelines for bunk bed construction
- Install safety rails on the top bunk
- Check weight capacity before use
This crib bunk bed transformation is ideal if you have twins or siblings close in age.
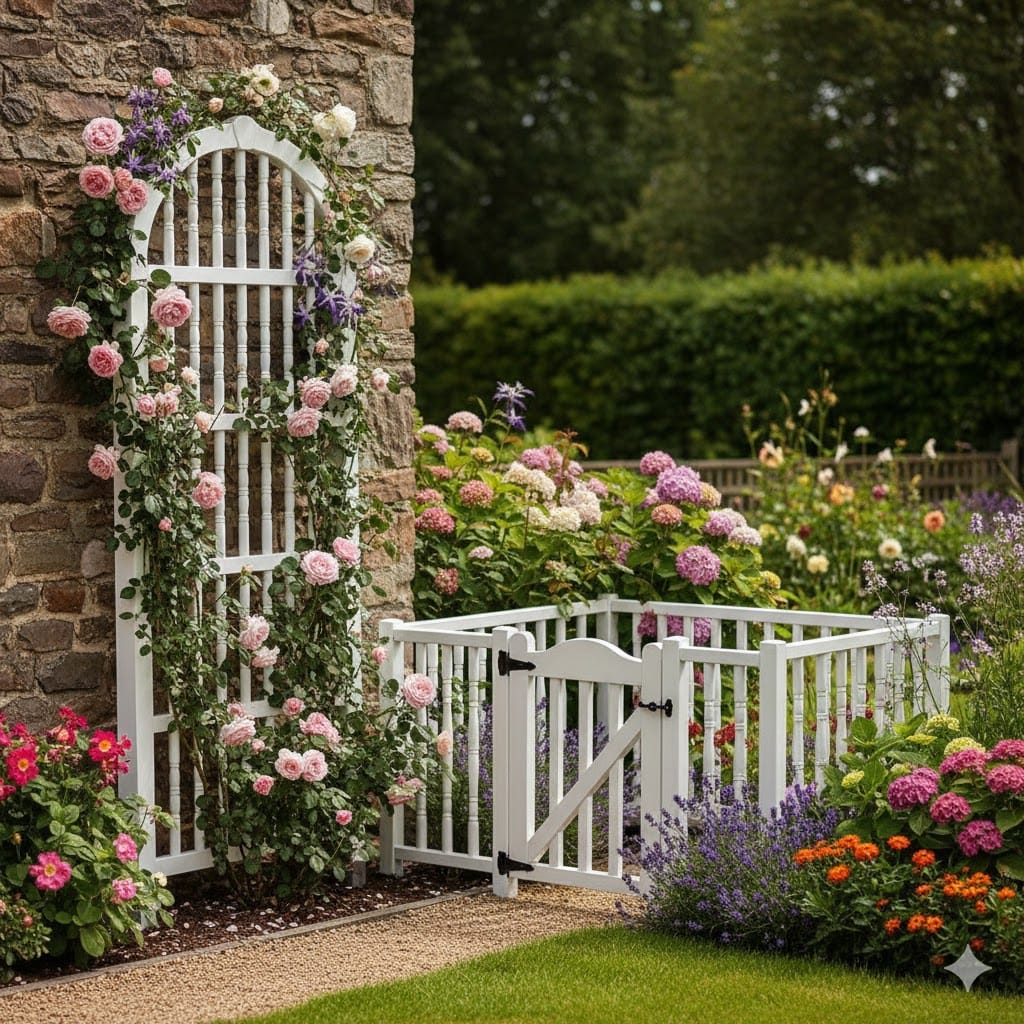
6. Garden Trellis or Decorative Display Railing
Difficulty Level: Beginner | Time Required: 1-2 hours
Take it outdoors! Wooden cribs make perfect garden structures for climbing plants and vertical gardens. Or, you can use the railing indoors to store books and magazines, hang picture frames, or display plants.
Creative Uses for Crib Railings:
- Vertical herb garden
- Photo display wall
- Jewelry organizer
- Magazine rack
- Kitchen pot lid holder
The opportunities are endless with this versatile crib railing upcycle!
Before You Start: Important Safety Tips
When upcycling your baby crib, keep these considerations in mind:
✓ Check for recalls on your specific crib model
✓ Remove all hardware safely and store small parts away from children
✓ Sand thoroughly to eliminate splinters and rough edges
✓ Use non-toxic paints and finishes, especially for children’s furniture
✓ Ensure structural integrity before putting weight on converted pieces
✓ Follow local regulations if repurposing for children’s sleeping furniture
Essential Tools and Materials for Crib Upcycling
Most DIY crib projects require these basic supplies:
- Sandpaper (various grits)
- Paint or wood stain
- Screwdriver and drill
- Measuring tape
- Saw (for advanced projects)
- Wood glue and screws
- Sealant or polyurethane finish
Make Your Upcycled Crib Last
To ensure your repurposed crib furniture stands the test of time:
- Prep properly: Clean and sand all surfaces before painting
- Choose quality finishes: Invest in durable paints and sealants
- Maintain regularly: Touch up scratches and reapply sealant annually for outdoor pieces
- Store safely: Keep indoor projects away from excessive moisture
From Nursery to Forever: Sustainable Furniture Solutions
Upcycling your baby crib is more than just a DIY project it’s a way to preserve precious memories while creating functional, beautiful furniture for your home. Each of these transformations offers a sustainable alternative to buying new furniture while adding unique, personalized pieces to your space.
Whether you choose a simple crib bench or tackle an ambitious bunk bed conversion, you’re giving that special piece of furniture a second life that your family will enjoy for years to come.
Subscribe for more eco-friendly home projects!


You May Also Like
Home Office Ergonomics: The Complete Guide to Creating Your Perfect Work-From-Home Setup